Mockup Of A Macbook Air Placed On A Desk

Creating new designs for an online shop is one of the best parts of the business. You get to let your creativity run wild as you create custom designs your audience will love while expressing yourself through color, graphics, and typography.

If this isn’t the case for you, you’re not alone. Rather than hiring a designer to take care of this for you, let us show you how easy it is to create your own designs with Placeit and how you can add these new designs to your shop in a snap!

Let’s get to it!

Table of Contents

🔥 P.S. Check out our latest tool! Upgrade your designs with our brand-new Image Background Remover.

How To Create Custom Designs With Placeit

Creating new designs can be a lot of fun, but if you don’t have a lot of design experience, it can turn frustrating really quickly. Luckily, Placeit by Envato offers a huge collection of customizable design templates you can use to create any type of design.

Create everything from apparel designs and book covers to social media posts and business cards! All of the templates are super easy to customize, but before you get overwhelmed, we’re here to walk you through it!

How To Use Placeit’s Design Templates

If you can’t currently watch the video, follow these steps:

  1. Head over to Placeit and hover Designs in the dropdown menu.
  2. Browse the design categories and their subcategories until you find the type of design you want to create. Click on the subcategory to see our library of templates.
  3. Scroll through the designs on your screen or use the filters on the left-hand side to narrow down your search.
  4. When you find a design you like, click on it to start customizing it.
  5. Once on the editing screen, you can change the text, choose fonts for your text, and pick colors for it. Or save yourself some time by creating your first brand kit on Placeit to customize any design in a breeze. P.S: Add extra text boxes if needed.
  6. Next, pick a graphic or upload your own. Choose colors for your graphic to give it a unique touch.
  7. Finally, choose a background (color, image, or pattern, depending on the template). Keep in mind that you can download your graphic with a transparent background for a completely seamless look for apparel and print products.
  8. You’re ready to download! You now have a unique design that is ready to be shared!

🧐 Worried your designs won’t look unique when designing with templates? Learn how to make designs not look like templates!

Customize T-Shirt Design Templates

For apparel sellers who want to create merch that will stand out and bring in loyal customers, we’ve got all types of apparel designs! Check out our ever-growing library of t-shirt design templates that cover all sorts of hobbies, holidays, aesthetics, and current events.

Even though we call them t-shirt designs, they can be used to customize all sorts of apparel and print items, so don’t limit yourself to just t-shirts.

🗓 Stuck on what types of designs to create for your shop? Check out this t-shirt ideas calendar with inspo for every month of the year!

Use Print-On-Demand Designs and Mockups

For print-on-demand entrepreneurs, we’ve got everything you need to make your brand a success. Not only do we have trendy design templates for your apparel designs, but we also have a huge library of mockups to promote your designs and tons of social media templates to market your brand! Check out all of our POD templates.

You can even make a logo for your brand using Placeit’s Logo Maker. No matter what your niche is, you’ll find what you need for all of your print-on-demand needs.

🏳‍🌈✨ Take your design journey one step ahead and get ready to learn how to keep unleashing your creativity with our new feature: Blank Canvas, to create anything you want from scratch but with the best Placeit assets! Let the magic begin. 

Find Free Design Templates

Pullover Hoodie Mockup Of A Surprised Kid Receiving Xmas Presents
T Shirt Design Template Featuring A Dragon Standing Over Flames
Mockup Of Two Art Prints On The Wall Of A Living Room

Before we get to how to add your new designs to your shop, we just want to let you know that we also have tons of free templates available. You can find everything from free t-shirt design templates to free mockups and even free video templates that will give you a leg up on the competition.

The free templates are updated every month, so if you see something you want, grab it before it’s gone. Be sure to check in every month to see what freebies have been added!

💡Don’t miss this post on the AI tools Placeit uses to create stunning design templates and how you can start using AI for your business!

😊🌟🛠️ Heads Up: Enhance your images like magic with our Placeit by Envato Tools suite! Find from AI design tools to cool editing gadgets to elevate your graphics effortlessly! Discover everything you’ve been wishing for! 💫

How To Add Your Designs to Your Ecommerce Shop

Start An Online Store In A Marketplace Or Through An Ecommerce Platform

With your new design ready to go, it’s time to add it to your shop!

Before you add a flat image of your design to your eCommerce shop, stop! When selling printed items in an eCommerce shop or in a marketplace, mockups will be your best friend. Your designs will be much more enticing to customers when they can see them on the item you’re selling.

You can print your items and have a photo shoot to get images of your designs in action, but that can be expensive and time-consuming. The alternative is to place your designs on mockups. You will get a seamless result every time with Placeit’s mockups. In fact, mockups will look just as great and realistic as if you had a full-blown photo shoot.

✨🚀 Looking for the perfect tool to upscale your small images? Say hello to our brand-new Image Upscaler tool – the effortless way to upscale your visuals with no loss in details! 

How To Add a Listing on Etsy

If you already have an Etsy shop, adding a new listing featuring your latest design is super easy. Just follow these simple steps:

  1. Log in to your Etsy account and click Shop Manager – the little shop icon next to your photo.
  2. For returning sellers, click on the Listings option on the left-hand side. If you’re a new seller on Etsy, you’ll have to go through the steps of registering as a seller and setting up your shop.
  3. Now, click on the option at the top that says Add a listing.
  4. Next, add photos and/or videos of the product featuring your design. Click on Add a photo and upload as many images as you need to give customers a thorough look at your product.
  5. With your photos uploaded, it’s time to select the thumbnail image for your listing. This will be what people initially see, so make it a good one! To pick a thumbnail image, simply drag the image to the first image slot.
  6. Next, it’s time to fill out the written information. Use your SEO knowledge to write a clear and descriptive title for your listing and a description. You’ll also need to choose a category for the item, add tags, decide if users can customize the item, etc.
  7. After that, set the price for the item. You can also enter additional information, like sales tax, SKU numbers, and other technical details.
  8. Next, set up shipping options for the item.
  9. Finally, you’re ready to publish your listing! Before you do, preview your listing to ensure it’s accurate. Once it’s ready, you can save the listing or publish it to your shop. It can take up to 24 hours to appear, so be patient.

💡 Explore this Etsy page to get all the visual assets you need to take your Etsy shop from drab to fab! 

How To Add Products to Shopify

Adding a new design to your Shopify storefront is a breeze. Follow these basic steps to get your latest design front and center!

  1. Log in to your Shopify account and navigate to the admin page.
  2. Click on Products in the menu and then click on the Add product button on the top right of your window.
  3. On this screen, you can start inputting your product information and details. Add a product name/title and a description.
  4. Below that, upload images and videos showing your new design.
  5. Next, add a price for the item. You’ll also see options for charging taxes on the item, a field for the original price of sale items, and the cost per item for resellers.
  6. Next, if the item is a physical item, you’ll need to check the appropriate box for it and enter the shipping information.
  7. If you will be selling the same product in multiple colors or sizes, you’ll need to fill out the information regarding variants.
  8. Now you can see a preview of what your listing will look like in a SERP, and, if you’re not quite happy with it, you can go back and modify the information on the product page until it’s right.
  9. Next, scroll back up to the top and, on the right-hand side, choose the sales channels you want to use to sell this product, the product type, and the vendor. You can also add a product to a collection so that it’s grouped with like products in your shop and add tags that will make it easier for shoppers to search for your product.
  10. When you’re all done, scroll back up to the top of the page and set Product status to Active. Click the green Save button to publish your product, and you’re done!

👕 Check out how these t-shirt size chart templates for your shop!

How To Add New Designs to Print-On-Demand Sites

Mockup Of A Macbook On An Office Desk

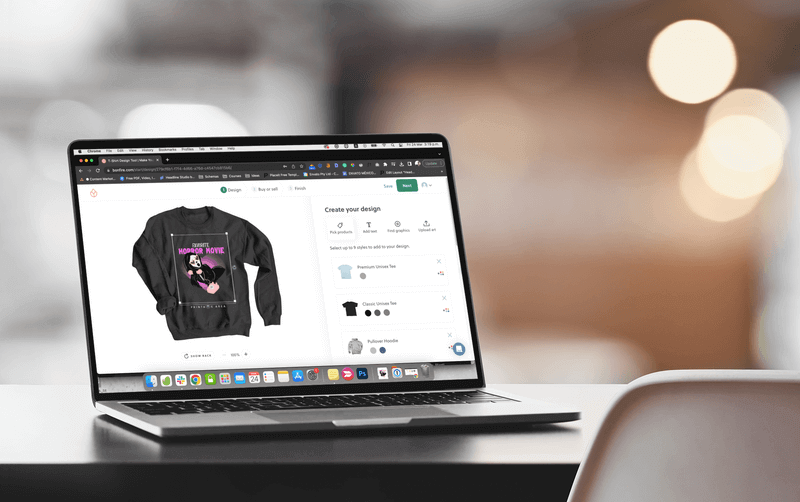
Starting your business the print-on-demand way is a great idea, especially if you’re just feeling it out or don’t have a lot you can invest into your brand at the moment. You can still create great designs and sell them on merch, but you might not get the freedom of using your own images or mockups.

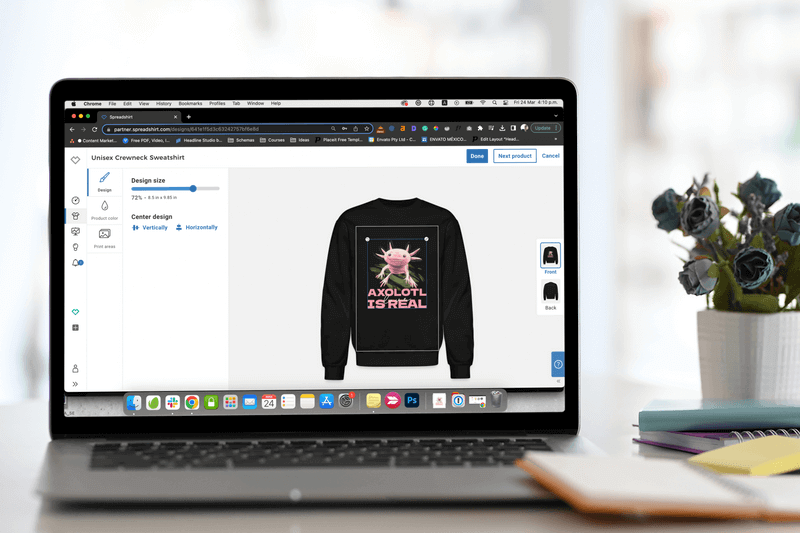
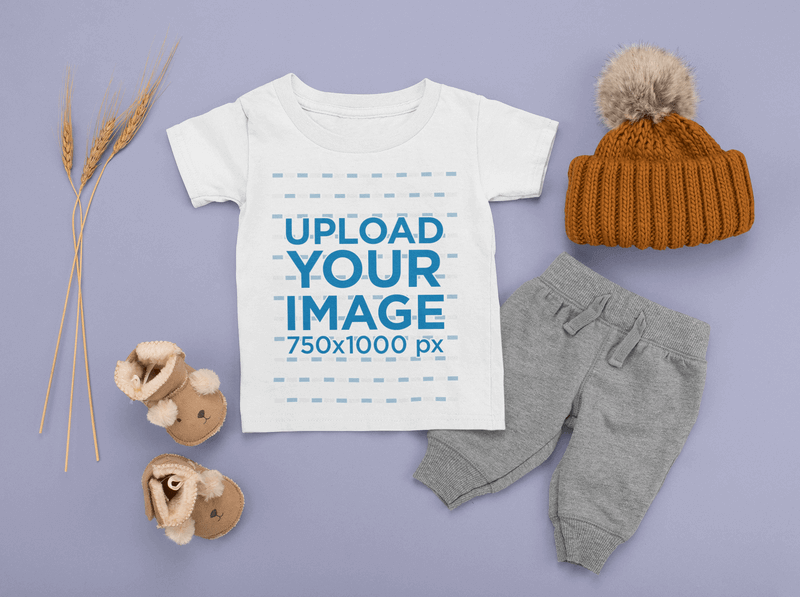
A lot of POD platforms have their own standard apparel and print mockups that they use to display your designs. You can choose to sell your designs on any number of products in the POD’s product catalog. T-shirts and other apparel are pretty standard, but you’ll also be able to add your designs to items like mugs, shoes, and even home goods.

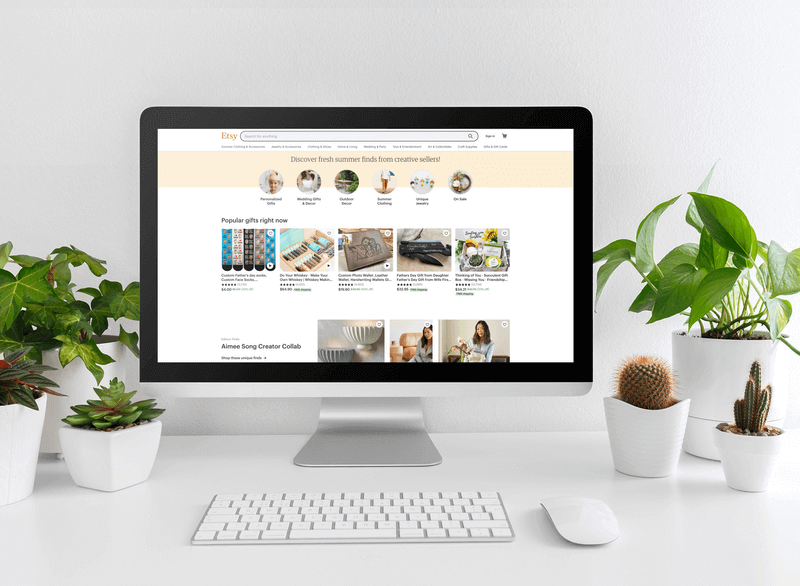
Find your preferred POD platform below so we can guide you through how to add your newest designs to your storefront or shop.

🔥 Not sure what POD platform is best for your brand? Check out this definitive guide on the best print-on-demand websites.

1. Printify

Printify doesn’t work like most other PODs because it requires you to connect your Printify account to an already existing shop on another platform, like Shopify or Etsy.

How To Add a Design to Printify

  1. Log in to your Prinitfy account and click on Catalog in the main menu.
  2. Choose the type of product you want to put your design on and select the print provider that best fits your business.
  3. Next, click on the Start designing button for the print provider you’ve chosen.
  4. Make sure your image file meets Printify’s print file requirements. If it does, you can drag and drop the file onto the t-shirt image or click the green button that says Add your design.
  5. Now, position and resize your design until it looks how you want it. Depending on the print provider you’ve chosen, you may be able to add designs to the front, back, and sleeve of the product.
  6. Next, click on Prices and variants to choose the colors and garment sizes you want your product to be available in.
  7. Once your item is ready, click on the Preview option to see what your final product looks like. If everything is looking good, hit the Save product button.
  8. From here you can edit the listing. Choose a title image, edit the title of your listing, change the description, and set your price. Remember to use your SEO knowledge to craft a compelling title and description.
  9. When you’re done making changes, you can hit Publish to have your new design published in your shop or simply save your draft and publish it later.

And, that’s it! Your new product is live and ready to sell!

2. Bonfire

What makes Bonfire unique is that its focus is on providing individuals and organizations the tools they need to run a fundraising campaign by selling merch. Anyone can sell merch on Bonfire, but things work a little differently here.

To start, you can set up a campaign that can run from 7 to 21 days and you are asked to set a selling goal for the campaign. Once you reach the end of your campaign, your apparel items will be printed and sent to their respective buyers.

How To Add a Design to Bonfire

  1. Log in to Bonfire and head over to your dashboard.
  2. Click on Campaigns in the left-hand menu and then click on the green Get started button.
  3. Next, select the items you want to place your design on. Bonfire lets you pick up to 9 products, so choose wisely.
  4. After picking your products, click on the different customization options. These allow you to add text to your garments, add a graphic from their library of graphics, or upload your custom design.
  5. If adding a custom design, make sure your design meets Bonfire’s file guidelines. If you’re ready, hit the Upload button to preview your design on the garments. Position and resize your design within the printable area until it’s just right. When you’re ready, hit the Next button at the top of your screen.
  6. Click Start selling in the pop-up and set up your campaign. You can decide when you want orders to be shipped, estimate your sales, and set a price for each item. You’ll be able to see your estimated profits, and if everything looks good, hit the Next button.
  7. On this screen, you’ll be asked to select the type of campaign you’re running, set the length of your campaign, and choose tags to describe your campaign.
  8. On the next screen, you’ll see a preview of your product page. Here, you can create a title for your campaign, write a description of the campaign, and update the product page’s URL. At the bottom of the screen, you can also add more information about the campaign and even include photos and videos.
  9. When your page is ready, hit the green Launch button at the top of the page. You’ll get a pop-up asking you to confirm and launch your campaign.

Your campaign is live and ready to impress your shoppers!

3. Spring

Spring (formerly Teespring) is a super popular option for POD sellers because of its ease of use and its huge audience. They also have a huge product catalog, so you’re sure to find the products you want to sell.

Whether you’re an artist looking to sell your art on new products or want to create custom t-shirts for your company, Spring is a great option!

How To Add a Design To Spring

  1. Log in to your Spring account and from your dashboard, click on the Create product button at the top of your screen.
  2. Browse the items available and click on the type of product you want to put your design on.
  3. On the editing screen, upload your design, resize it, and position it where you want it.
  4. After that, choose product colors and set a price for the item. You’ll be able to see your profit margin as you change the prices. When you’re all set, hit the Continue button at the bottom of the screen.
  5. Now, choose the additional products you want to put your design on. Spring has all sorts of items, from standard t-shirts and apparel to more specialized items like bath mats and Apple Watch bands, but you can only choose up to 15 products.
  6. When you’ve chosen the products for your listing, hit the Continue button.
  7. Now you’re ready to type in a title and description for your listing. Add a custom URL handle and set your listing’s visibility.
  8. When you’re ready, hit the Launch Listing button at the bottom of the page to publish your listing.

It doesn’t get easier than that! Your listing is now live and you can even order samples of your product to ensure the quality is right.

4. Redbubble

For independent artists looking to make some extra money, Redbubble is the perfect option. This Australian print-on-demand platform has the tools you need to sell your art the easiest way possible.

Of course, you don’t have to be an artist to sell on Redbubble. You simply need some creativity and original designs to get started.

How To Add a Design to Redbubble

  1. Log in to your account and click on the icon with your image. In the dropdown menu, click on the button that says Sell Your Art.
  2. Under the Create products option, click on Add designs.
  3. Next, click on Upload new work and select your image file.
  4. Now you can type in a title and a description for your design and add some tags to it. Scroll down to see your design on different products.
  5. Click Enable or Disable to select the products you want to sell featuring your design.
  6. Click the Edit button below the products you want to put your design on in order to see more customization options. Choose the style of the product, resize your image, move your design around, choose a color for the garment, and customize the back of it. When you’re done making adjustments, click the button at the bottom that says Apply Changes.
  7. When you’re done selecting products, scroll to the bottom of the page to fill out some details. When you’re finished, click the Save work button.

You’re all set! Your artwork has been uploaded it and you can see it on all the products you selected for it.

5. Society6

Society6 is thee POD platform for artists. They are known for their top-tier art produced by talented artists stretching through a number of mediums. You can put your artwork on a number of products, including canvases and wall tapestries, and sell them through your artist shop.

How To Add a Design to Society6

  1. Log in to your account and click on Sell, located in the top right corner of the page.
  2. Make sure your image meets the file requirements. If it does, go ahead and drag and drop your image file into the provided space.
  3. Next, give your design a title and description and add some tags to it. When that’s done, click on the Continue to create products button.
  4. Society6 will asses the pixel dimensions of your file and add it to the products that make sense for it. Browse the products available and use the toggle to turn on the products you want to put your design on. You can click edit on any of these products to reposition your image.
  5. Now it’s time to set a price for your products. You will be able to see how much you’ll profit from each sale so you can make the best pricing decision.
  6. Finally, once your product is all set up, hit the Publish button. Note that it can take up to 30 minutes for your product to show up in your shop.

Ta-da! Your new design is published and ready to impress your audience!

6. Spreadshirt

Spreadshirt is a massive print-on-demand platform that offers over 200 customizable products that your designs would look great on. They are also known for their eco-friendly production, fair employment practices, and transparent manufacturing methods.

Spreadshirt gives you the option of selling in your own storefront or in their marketplace. This is up to you and your business goals.

How To Add a Design to Spreadshirt

  1. Once you’re logged in, click on the Start Selling button at the top of your screen.
  2. Choose where you want to sell your design: the marketplace or your own Spreadshop. We’re choosing the marketplace for this walk-through.
  3. Be sure your design file meets the requirements and then click on Browse to upload your design.
  4. Once your design has loaded, click on it to start selecting the products you want to put it on.
  5. Click on All Products to see all of Spreadshirt’s catalog. You can narrow down your search by category and by available colors. To put your design on an item, simply use the toggle to turn it on.
  6. Once you’re done selecting products, click on the Done button at the top of your screen and then click the Next button.
  7. Next, you’ll need to add a design name, description, and tags.
  8. When you’re done, hit the Create button to publish your design!

Get ready to rake in the sales now that your design is ready to be purchased!

7. TeePublic

TeePublic is another POD that is art focused. Through this platform, you can put your artwork on a number of products and make it available to shoppers all over the world. On top of this, if someone comes across your designs and loves them, they can hire you to create more art for them!

How To Add a Design to TeePublic

  1. Log in to your account, and under My Account click on Upload a Design.
  2. You can do bulk uploads to save you time or upload a single image. We’re opting for the single-image option. Drag and drop your design into the upload area or click on the space to upload your design from your computer.
  3. Once you see your design, scroll down to fill in your design’s details. Type in a title, a description, a main tag, and supporting tags.
  4. Scroll down further to pick the products you want to customize with your design. Configure all of the items you’ve chosen by placing your design where you want it and choosing colors for the products.
  5. Next, hit the Publish button to add your new design and products to the marketplace!

Don’t forget to share your newest design with your audience so they know where to find it!

⭐️ Need more inspo for your designs? Explore the best POD niches for your business or tap into a seasonal campaign, like Chinese New Year!

8. Threadless

Threadless is known for its fun and competitive design challenges, so you’ll definitely have some strong competition in the marketplace. They also put a large emphasis on art and quality design, so be sure to upload the designs you’re most proud of.

How To Add a Design to Threadless

  1. Log in to your account and then click the Sell Your Art option located next to your account image.
  2. From your shop’s dashboard, under Artist Shop in the left-hand menu, click Add Product.
  3. Next, enter your product’s details, including a product name and image.
  4. Below that, you can select different custom products you want to sell and upload the corresponding designs for each. When you’re ready, hit the Create Products button.
  5. Now, update your product title, type in a description, add a meta description, and choose some tags.
  6. Scroll down to see more products that you can add your design to and select the products you want to customize.
  7. When you’re ready, scroll to the top of the page and use the toggle to publish your product.

Check out your product’s page to ensure it’s looking great. While you’re there, grab the link and send it to your customers!

Wrapping Up

Print-on-demand and eCommerce platforms are meant to take the technical work out of running an online shop. Because of this, you can be certain that adding a new design or product to your shop will always be an easy and straightforward process, no matter the platform you’re using.

Hopefully, this guide has made it easier than ever to add your latest and greatest designs to your shop. And, don’t forget, that Placeit’s design templates and mockups are here to make running your online shop even easier!

Let us know what other POD platforms you want us to help you with!

FAQ - How to Create Custom Designs and Add Them to Your Shop


0 CommentsClose Comments

Leave a comment

Scroll Up