Here Is Everything You Need to Know About Facebook Pixel Code
You just started working with Facebook Ads but are still trying to figure out how everything works. Every new term, tool, and technique may seem confusing, but don’t let that stop you! Today we’re going to take a look at Facebook pixel code: what they are, what they do, and how to set them up. It’s way more simple than it looks, we promise.
What You’ll Find:
Why should you use pixels, anyway? Pixels can help you track the number of people that land on your website after clicking on one of your ads, as well as to detect how many of these visitors completed an action you wanted them to, like making a purchase or subscribing to your newsletter. Those actions are called conversions. With all of the data collection that pixels do, you can create specific targeting groups for remarketing or generate similar audiences to those that have already interacted with your site.
What Is A Facebook Pixel?
A Facebook pixel is an analysis tool that comes in the form of code that you place on your website. It’s important to note that if you are running ads on social media but do not have a website, you should be looking at metrics such as reach, engagement, and followers, but you can also use a retargeting hack that we’ll touch on shortly.
Pixels track conversions through orders called events, but we’ll get there later. Remember that ad content is very important to generate the desired conversions. For example, let’s say you own a t-shirt business and have a sale on summer tops. You have to create the need in people’s minds to go onto the website and make a purchase for such a good deal. Most likely, they won’t figure this out for themselves if your ad is not clear and enticing. Visuals are key, so make sure that your ads are eye-catching. A good photograph of your product in an attractive stage or featuring real-life models can lead to aspiration, and aspiration may lead to a purchase!
Pro Tip: Use this Facebook Image Size Guide for your Ads
Don’t worry if you can’t find the time to have a professional photoshoot of your products; try Placeit’s apparel mockup generators! We used them for the examples below:
![]()
Now that we’ve seen the importance of ad content let’s move on to how to create the pixel.
How to Create a Pixel
To create a pixel, you need the following:
- Your Facebook Ads Manager. This one will be automatically created when you make an ad. You can access it by clicking on the arrow next to “Quick Help” on the top-right side of your personal feed. Select “manage ads” on the drop-down menu. (Or go to facebook.com/adsmanager).
- A website you or a developer can edit.
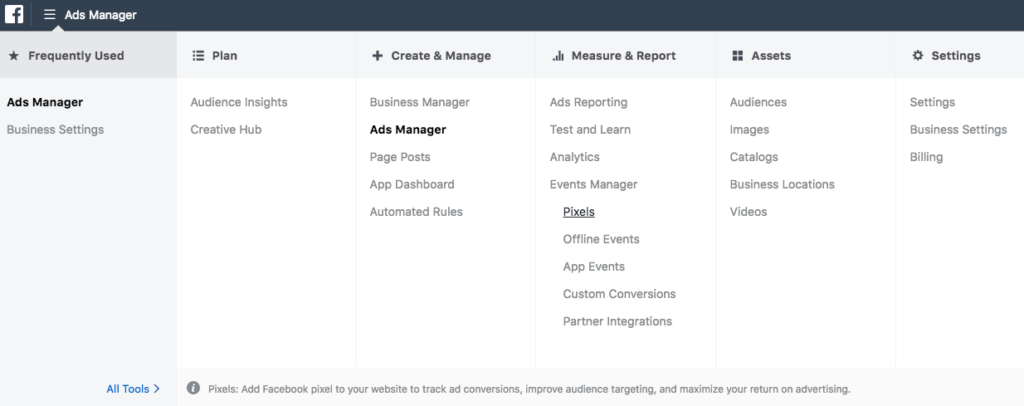
Once you’re ready, go to the main menu on the Ad Manager and click on “Pixels.”

Then, you’ll see a screen like this. Click on “Create a Pixel.”
![]()
Now it’s time to select a name for your pixel. For this example, our t-shirt business is called Strings For Life.
![]()
Click on “Create.” Your Facebook pixel code is ready to be installed! You’ll see a page with instructions on what to do with the code Facebook will provide you. One of the options is to e-mail the piece of code to a developer with access to the main code of your website for them to place it. The other option is to view the code to install it yourself.
![]()
Copy the code and paste it between the <head> and </head> in your website code. These are called header tags. Make sure to do this on every page of your website, or paste the code into your template if you’re using one.
If you’re not sure how to do this, check out this Facebook article on using Facebook Pixel with your third-party website. It includes detailed instructions for different web partners. Can’t find your web host? Try contacting them for guidance.
Once you’re done, you’ll be ready to install events.
Facebook Pixel Code Events
Events are triggered by specific actions that users do on your website. Let’s say you have installed the Complete Registration event code on the registration thank-you page. The only way to get to this page is by completing a form. Therefore, every time a user gets to this page, the pixel will count as one conversion, thanks to the installed event.
The default pixel code fires the page view event, which can be used to create custom audiences and custom conversions. This event should not be removed as it may cause an issue.
Facebook has a set of 9 standard events that you can choose from based on the actions you want to track on your site.
![]()
Once you’ve selected one, you’ll be presented with two options. Track Event on Page Load or Track Event on Inline Action.
- Track Event on Page Load: pick this option if the action you’re interested in can be tracked when someone lands on a certain page, like the one in the example above.
- Track Event on Inline Action: Choose this option if the action you care about requires the user to click on something (like adding an item to their shopping cart).
![]()
At this point, you can optionally add parameters like conversion value and currency to the event. This can help you report your return on investment. When used to track purchases, we recommend you to add this value dynamically at the time a purchase is made. A good option is asking your webmaster to do this.
To install the events:
- Page load events: Place the code just below the closing </head> tag. This could be right after the <body> tag on some websites.
- Inline action events: Copy the code between script tags (HTML elements) next to the action you plan to track, like a button.
Facebook also gives you the option to create custom conversion events. However, these won’t track or optimize your campaigns without additional action. For more information on how to create custom events, consult this article.
Now you can create as many events as you need (standard and custom) and place them where necessary.
Regardless of whether or not you have a website, you can now also embed your Facebook pixel into custom short URLs and build out your retargeting audiences with people who have clicked on your links. This is called link retargeting, and in a nutshell, it is a way for you to reach people who have never visited your site, enabling you to quickly and cost-effectively grow your retargeting audience and widen the net of prospective customers.
Track Your Results
Great, you’ve finished installing your pixel and events! Use this chrome extension by Facebook to make sure your pixel is working properly.
Want to see what your pixel is tracking? Go to Facebook Analytics right from your Ad Manager menu.
![]()
Or visit: https://analytics.facebook.com/get-started
Select your pixel on the pixels menu. There, you’ll find the information your pixel is collecting. Make sure to give it a few hours to grow. Do notice that it won’t show you what was happening on your website prior to its installation.
This is the overview page on Analytics:
![]()
On the left, you’ll find a menu with lots of view options. You can track users on a timeline, create dashboards, conversion funnels, and more. Feel free to explore all of what Analytics has to offer. Alternatively, you can use Facebook analytics tools to get a better understanding of this data.
You’re all set! From now on, when creating ads or boosting posts, activate your pixel by clicking on the Facebook pixel toggle under “Tracking Conversions” on the edit window.
![]()
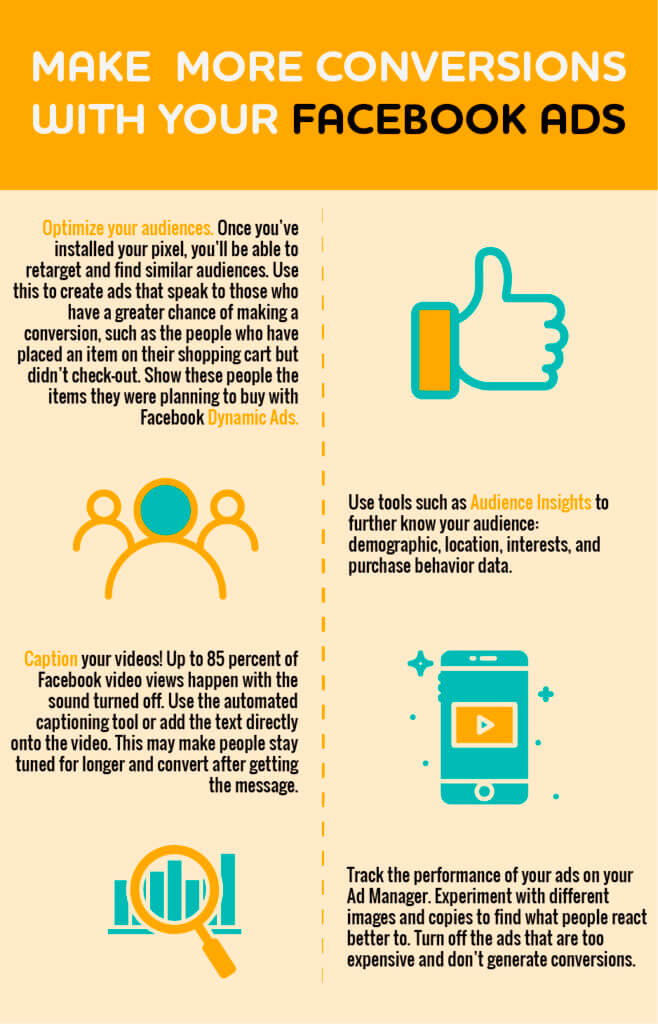
Now you can track how your effort is paying off! If you’re interested in further optimizing your campaign strategy, check out the guide down below that we prepared for you.

Last Words
As we’ve seen, a Facebook pixel can be a very useful tool for your online marketing campaigns. Go ahead and start generating data to analyze and improve your Facebook ads. It’s always important to keep track of what you do because something that isn’t accountable or doesn’t have a history can’t be optimized, but with a pixel, you’ll be right on track to grow your business.
Remember that your ads and posts speak for your brand, so if you’re not convinced with the looks of your material yet, use Placeit’s Apparel Mockups, Digital Mockups, and Social Media Image Maker to create impressive images.
If you liked this post, you might also enjoy our Facebook Ads for Authors: A Step-by-Step Guide to Promote E-books post or our How to Create Facebook Video Ads That Sell T-Shirts post.
“Making mockups and designs on Placeit is simply great.”
Noah Myers 5/5
Start Performing Better
Now you know what a Facebook pixel is, how to install it and get the best out of it. However, great advertising requires astounding visuals. Use Placeit to create beautiful mockups and designs for your business online platforms.
Make Better Images For Social Media
1 Comment
Glen
Your method of explaining the whole thing in this post is really nice, all be able to effortlessly understand it, Thanks a lot.